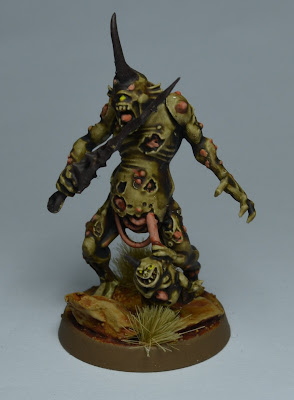
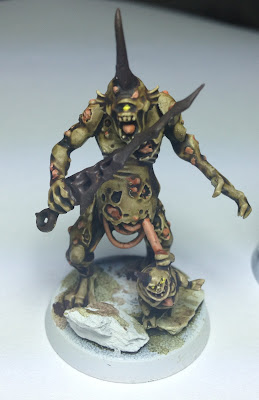
 |
| Finished Nurgle Plaguebearer |
So here's a short tutorial on how I do this.
 |
| White Undercoat |
The miniature was given a thin undercoat of pure white. I generally use Vallejo undercoats as I find these can be quickly applied with an airbrush.
 |
| Athonian Camoshade Coat 1 |
Once the undercoat was fully dry, I applied a generous coat of Athonian Camoshade to the miniature using a Washbrush and then left the miniature to dry (mainly as the Lord or Terror had hidden her hairdryer....)
 | ||
| Athonian Camoshade Coat 2 |
With the first layer of shade fully dry, I applied a second generous coat of Athonian Camoshade. This was then followed by a thick coat of Agrax Earthshade.
 |
| Ratskin Flesh Coat 1 |
Step 4:
Having located the Lord of Terror's hairdryer and accelerated the drying process slightly, I painted the warts, intestines and other ikky fleshy bits with a thinned coat of Ratskin Flesh. Given that the base layer paints from GW are pigment dense, I used Vallejo airbrush thinner to do this, rather than the more expensive Lahriman Medium. As this is a Nurgle demon, I wasn't too worried if the end result wasn't totally accurate.
 |
| Dryad Bark Coat |
Anything not expected to be green or pink (ick!) was given a thinned coat of Dryad Bark.
 |
| More Washes... |
The Dryad Bark areas were given a thick coat of Agrax Earthshade. Similarly, the Fleshy bits were given a coat of Reikland Fleshade. The miniature was left to dry overnight (the hairdryer had been removed after accusations of using it for purposes that were not deemed appropriate)
 |
| Cadian Fleshtone |
Fleshy areas were given a thinned layer of Cadian Fleshtone, layered to retain some of the darker Flesh showing through.
 |
| A severe case of Jaundice |
The demon's single eye was given two thinned coats of Flash Gitz Yellow. Ikky...
 |
| Bones and Teeth |
Teeth and bones were given a coat of Zandri Dust, followed up by Ushabti Bone and Screaming Skull.
 | |||
| Based and Varnished |
To finish the model off, I covered the base in Armageddon Dust, drybrushed when dry with Tyrant Skull. The larger rocks were painted with thinned Zandri Dust and drybrushed with Tyrant Skull. The whole base was then given a wash of Seraphim Sepia.
Once dry, Vallejo Matt Varnish was used to tone the whole model down.

Nice stuff. I'll be using this for sure. On the hair dryer front: Keep it up. The Lady Inquisitor finally broke down and bought me a small travel dryer - ostensibly to dry minis, but the number of times I've had The Agent of Chaos in my lap with a brush in my hand far outweighs the number of times I've used it for mini drying. I'm beginning to suspect an ulterior motive...
ReplyDeleteThank you for this tutorial, I will try it soon on my Plague zombies...
ReplyDeletesweet! How I done mine :)
ReplyDeleteAwesome, thanks!
ReplyDeleteThanks a ton! I've finally found a perfect way to paint my zombies!!
ReplyDelete... must - eat - brains